If you are an entrepreneur, and want to receive money via your Facebook page, then you need an online payment mechanism to receive the money that customers pay.
For that you need a PayPal account.

PayPal is a fast, safe way to send money, make an online payment, receive money or set up a merchant account.
First you need to create your account in PayPal. And then you have to link this account to your Facebook Business page.
Follow the steps to add your PayPal account to your Facebook Business Page:
- Log in to your Facebook account
- Type "Static iFrame" in Graph search

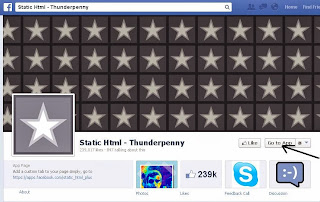
- Select "Static HTML - Thunderpenny" option
- Click "Go To App"
- Click on "Add static HTML to Page"

- Choose the page

- Now click on the "Add Tab" button
- You will get a "Welcome" Tab below your page name

- Click on the tab. You will see the "Edit tab" button to edit the settings of this tab.

- In the Edit settings, you may see this page

- Click on "See More Apps"
- Here choose on "PayPal" app

- Click on "Use PayPal App" button as above

- Now here you have to enter the product name, its image, description, your PayPal account address, item price in USD, etc.
- After entering all the details, click on the "Preview" button and watch whether everything is correctly entered.
- Then click on "Save and Publish".
- Now click "View tab on Facebook" button


Have a look at the image below:

Great !! Click on it and you will see the newly added tab which says "Welcome". That is your Paypal account tab.
Now you have to change the name of the tab with the image. To do this, click on the top right corner of the "Welcome" tab. You can see the list of options.
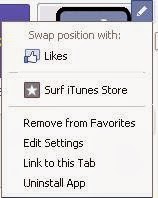
Change the name and image of the tab.

Click "Save" .
Now after all this, test whether the tab is working or not.
First of all refresh the page and then go to the PayPal tab which is installed recently. You can see that when you click on the tab, the details of the product is displayed and when the user clicks to payment, then it redirects the page to PayPal account where the user has to make payments.
We hope that your PayPal account is successfully added to your Facebook Business Page, and you are on the way to receive great payments!
I just added PayPal on our Facebook page. With it's inclusion, my transaction with our customer's became easier and Facebook users who stumbled upon the page won't need to go to our site to avail the product.
ReplyDelete-Australia Business News Online
Great!!! That is interesting. Congrats.
ReplyDelete